Teaching art on a cart presents several challenges: Limited space, limited supplies and unknown variables such as what technology will be available in each classroom. In this comprehensive guide, I will explore practical strategies and in-depth tips for delivering engaging art lessons on the go. From setting up your mobile art studio to effectively managing supplies, this article will equip you with the tools you need to successfully teach art from a cart. Let’s dive into the details!
Setting Up Your Art Cart
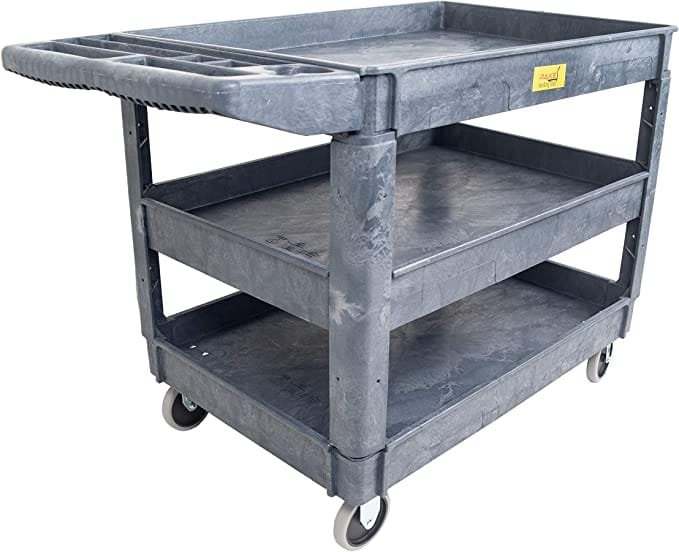
One of the first things that you will need for your mobile art studio is the cart….of course. Now over the last few years, I have been on a cart at every school. This started in 2020 when the pandemic hit. My local schools were trying to minimize student movement through the school building, so we were forced to go to them for class. At each of my schools, I had a different type of cart. At one school, I had a heavy-duty Rubbermaid cart and at the other two schools I had metal A/V carts that I borrowed from the library. I will say that both of the metal carts were MUCH louder rolling down the halls than the heavy-duty plastic one.
While the selection of art carts on the market have grown over the last couple of years, I would still recommend the Rubbermaid brand Brute utility cart. This cart has 3 shelves, high sides so nothing can roll away and is just small enough to fit through classroom doors. The downside of this cart is that there is are not any drawers or doors that you can use to securely store things like your laptop. Also the shelves are not adjustable so what you see is what you get. When selecting your cart, think about what features are most important to you (size, storage options, price, etc) and select a cart that suits your needs best.
One last tip….if you have access to multiple carts, you may want to set up carts based on the supply being used. For example, I know that some teachers have a clay cart for their 3D art units with another set up for painting. If you have the carts and the space, this is another method to consider.
It appears that the service/utility cart that I have is no longer offered on retail sites and is not listed on the Rubbermaid Commercial website, either (discontinued I assume). I have linked similar ones below.
 550 lb. Capacity Heavy-Duty Utility Cart (Amazon). | 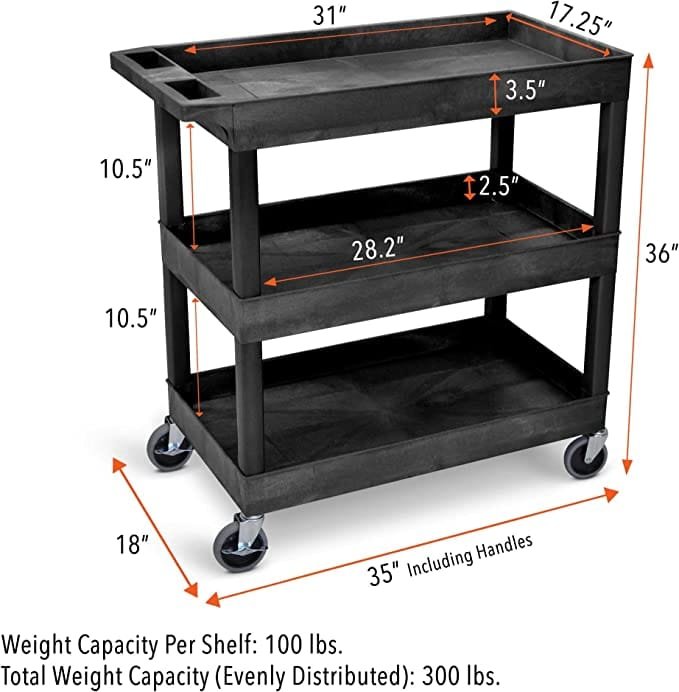 Stand Steady 3-Shelf Rolling Utility Cart (Amazon) |
 Rubbermaid 2-Shelf Utility Cart with Ergonomic Handle (Amazon) | 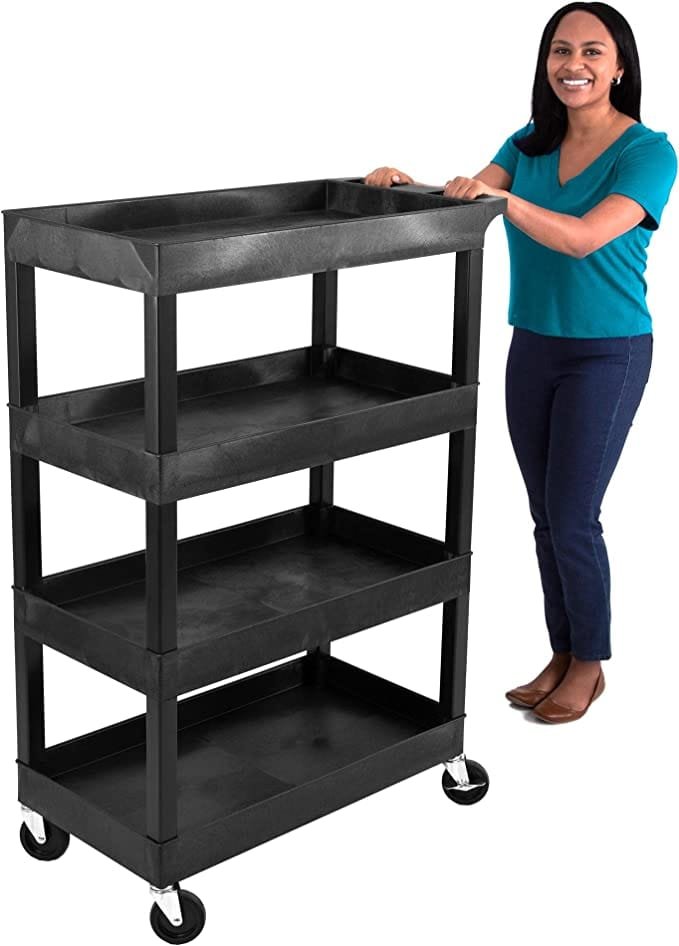 4-Shelf Tall Utility/Service Cart (view on Amazon) |
Storage Solutions
Consider using clear containers or labeled bins to keep materials organized and easily identifiable. This approach ensures quick access to specific supplies during lessons. Personally, I liked using stackable trays for my art supplies and paper. Since I could stack my art supplies, it allowed me to put more on each of the cart’s shelves. Stackable trays made organizing stationary paper much easier because they usually come with lids that also have a lip. However, if you are on a tight budget or in a pinch, take a few of the cardboard lids from a few cases of copy paper (check your teacher’s workroom).
For me, I organized my art supplies by class. Sometimes this meant that each class had supplies on a dedicated shelf. At other times, I would consolidate all art supplies and just hand out what I needed as I would arrive to each class. Really, it just depended on how many classes I was trying to cram on the cart at once.
Additional storage can be added via hooks and other accessories. Using heavy duty command strips will allow you to add hooks that you can hang HDMI cables or power cords from. Hooked cup holders can attach to the lip of the shelves and can come in handy for carrying your pencils and pens or to hold paintbrushes, spare pencils or any other art supplies you may need to carry around. Adding a dowel to your cart will give you a convenient place to store rolls of paper towels.
Essential Art Supplies
As you plan your art lessons, identify the essential art supplies that will cover a wide range of projects and techniques. In order to travel as light as possible, opt for versatile materials that can be used across different mediums and artistic styles. Consider including items such as colored pencils, watercolor paints, brushes of varying sizes, scissors, glue sticks, and markers. Maintain an inventory of these supplies and replenish them as needed to ensure smooth and uninterrupted lessons.
I personally traveled with several clear, plastic Sterilite shoe boxes on my cart. One box had scissors, another glue sticks and another short-handled paint brushes. I would also cycle boxes of colored pencils, crayons and/or markers in and out as I needed them. These specific boxes have lids with lips so stacking 4-5 of them only took up a smallish portion of my cart’s top shelf.
Other Art Supplies to Consider
Other items to keep on your cart would be a little bucket with a small bit of water in it (1 inch or less of standing water) and another larger empty bucket. I would use the small bucket of water to keep the bristles of my used paint brushes wet until I could get to a sink to clean them and the larger bucket as a dumping ground for my student’s dirty paint water (it is good idea to have a lid on this one since it will slosh around as your travel).
Other supplies to keep on your cart at all times would be a roll of absorbent paper towels and disposable wipes. Paper towels would be used for spills and the wipes are used by each student to wipe off their desk and their hands at the end of class. Alternatively, you could travel with a few reusable towels and a spray bottle of soapy water if using disposable wipes isn’t your thing.
Lastly, you may want to consider keeping a small dry erase board or portable easel paper on your cart. Depending on the classrooms that you will be visiting, you may or may not have a way to demonstrate drawing techniques, showcase reference images or to list lesson objectives. Use hooks to attach your posters, easel pad or dry erase pad to the front of your cart. Keep things lightweight and portable if you are considering including some type of visual aid on your cart.
If you are like me, you may want to have visual aids but without the use of bulky paper pads or dry erase boards. If that is the case, travel with a Chromebook and HDMI cable. I would attach my Chromebook directly to whatever type of display the teacher had in their room via the HDMI cable. From there, I could share photos, videos, presentations and even draw step-by-step on my Chromebook’s touchscreen. If your school’s teachers have Apple TVs in their rooms, just use screen mirroring and connect to their Apple TV. This is a wireless solution and works seamlessly if you have an iPad or Macbook.
Maximizing Space and Organization
Lesson Planning
Efficient lesson planning is crucial when teaching from a cart. Consider the space limitations of your mobile art studio and design projects that can be adapted to different settings. Prioritize projects that require minimal setup and cleanup while still offering engaging and creative experiences for your students. Plan the sequence of activities, step-by-step instructions and consider the estimated time needed for each lesson. These steps will ensure a smooth flow of the class and maximizes instructional time.
From a practical standpoint, try to plan your lessons so that each grade level is NOT using an entirely different set of art supplies from one another. It is a lot easier to pack a cart if every grade level is painting when compared to having one grade level doing clay, another painting, another making a collage and another doing printmaking. Streamline the amount of supplies you need by planning your lessons carefully.
Supplies and Materials Management
Develop an effective system for managing art supplies and materials on your cart. Use labeled containers or drawers to categorize materials based on their types, such as paints, brushes, or paper type. Consider creating separate compartments (via bins or some type of divider) for frequently used items and reserve a section for less frequently used or specialty supplies. You may also wish to organize your cart by class or grade level. Really, you will just need to find what works for your style and schedule.
Regularly evaluate your inventory and restock supplies to avoid shortages during lessons. Develop a checklist to ensure all necessary materials are packed and ready for each class. As you are packing your cart, always remember to bring a few more items than you think you will need. There have been many times when I arrived at a class to find that I had a new student or two that I had not planned for.
Compact and Portable Techniques
Embrace art techniques that are compact, portable, and require minimal space and materials. Introduce students to techniques such as sketching, doodling or mixed media, which can be done on a smaller scale and with limited resources. These techniques allow for greater flexibility in your mobile art classroom while still providing ample creative opportunities for students. Encourage students to experiment with alternative materials and adapt projects based on their interests and available resources.
Creating a Dynamic Learning Environment
Classroom Management
Establish clear expectations and behavior management strategies to maintain a positive and focused learning environment. Communicate your expectations to the students from the beginning and reinforce them consistently. Implement routines such as a designated spot for students to return supplies, a signal for attention, or an opening ritual to engage students at the start of each lesson. Encourage open communication, active participation, and respectful collaboration among students. This fosters a sense of belonging and ownership within the classroom.
If the teacher has a well-established method of managing his/her classroom, I recommend that you follow what they have already put in place. Since you are in someone else’s space, it is often a lot easier to just go along with what they are already doing (Dojo points, clip charts, etc). This way the students are not having to learn an additional classroom management system and the materials needed are already there and in place.
Flexibility and Adaptability
Embrace the advantages of teaching from a cart by incorporating flexibility and adaptability into your lessons. Artistic expression should be encouraged, and the creative process should be emphasized over the final product. Allow students to explore alternative materials or adapt projects based on their interests and the resources available to them. Encourage experimentation, problem-solving, and critical thinking skills. This approach nurtures individuality and allows students to make meaningful connections between their own experiences and the art they create. Also, remember to roll with. the punches as the teacher. There will be times when you to tweak your lesson on the fly because of a forgotten supply or technology that is suddenly refusing to work. Be flexible!

Since you are in their space, students may have additional art supplies that they have brought in from home. Allow them to use any of their own art supplies in their work during art class. Students are usually the most at home in their gen ed classroom so you may find that students are more willing to take a chance while in their “natural habitat”.
Conclusion
Teaching art from a cart requires careful planning, effective organization, and adaptability. By setting up a well-equipped mobile art studio, maximizing space and organization, and creating a dynamic learning environment, you can successfully engage students in meaningful art experiences regardless of your location. Embrace the mobility and flexibility of teaching art from a cart, and witness your students’ creativity soar even as they explore their artistic potential in this limiting educational setting.
Leave a Reply